Guided Task: Your First Eclipse Project
Learning Outcomes
- Create an Eclipse project
- Create a package
- Create a class
- Execute a program in Eclipse
Best Practice: Integrated Development Environments
When you first learned how to write Java programs, you probably started by writing code in a text file, compiling using the javac command, then running your program from the command line using the java command. This form of programming is what we’ll refer to as command-line programming, and it follows the practice of write/edit-compile-execute. While command-line programming has many advantages, it can be quite tedious. After all, your text editor doesn’t usually provide much outside of… well… editing. Professional developers gravitate toward integrated development environments (IDE) for their programming. The idea of an IDE is to integrate many different developer tools into a single program (such as code editing, compiling, running, file management, code navigation, documenting, version control, and so on). Programming with an IDE can provide some of the following advantages over command-line programming:
- Compiling is built-in. Whenever you click Save, your code is compiled for you.
- A controlled execution environment means that you can control how exactly your program will be executed without changing what your current system is configured for (such as running your program using different Java virtual machines).
- A Graphical User Interface (GUI) provides immediate feedback on compile errors, warnings, and other problems with your project.
- IDEs are highly customizable. From formatting and coloring preferences to programming in various languages and technologies, IDEs are extremely extensible.
- Code editing and navigation is much easier because the IDE “understands” the language you’re working with (you’ll understand more of what this means with a few examples).
- IDEs support large projects by providing many other tools not related directly to programming, but with software development in general.
In this Guided Project we’ll be covering Eclipse, a professional-grade, open-source development platform for Java (and many other languages!). While reviewing prerequisite materials, we’ll focus on some of the features found in Eclipse that are not found in command-line programming.
A note about audience. We assume the users for this tutorial are working on their own machines and can devote permanent space to their Eclipse work.
Installing Eclipse
See the Eclipse Installation Tutorial for instructions about installing Eclipse and the other plug-ins you will be using this semester.
Starting Eclipse
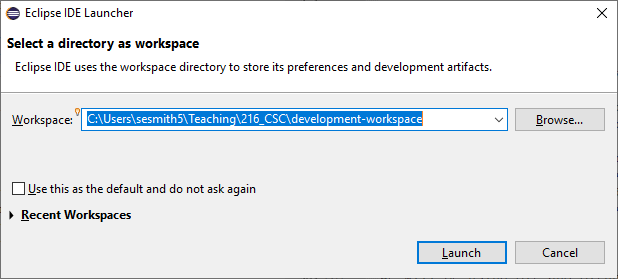
When you first start Eclipse, you are asked to select your workspace. The Eclipse workspace is a permanent location for your work. You can have many workspaces on one computer. A workspace is just a folder that holds a related collection of Eclipse projects and metadata (stored in the .metadata directory) about your custom settings for your workspace. We recommend using a single workspace for CSC216. Choose any location on your hard drive where you want your work to be stored and click OK to load the workspace.
The first time you start with a fresh workspace, the Welcome view opens. Close that view by clicking the X on the Welcome tab under the Eclipse menu.

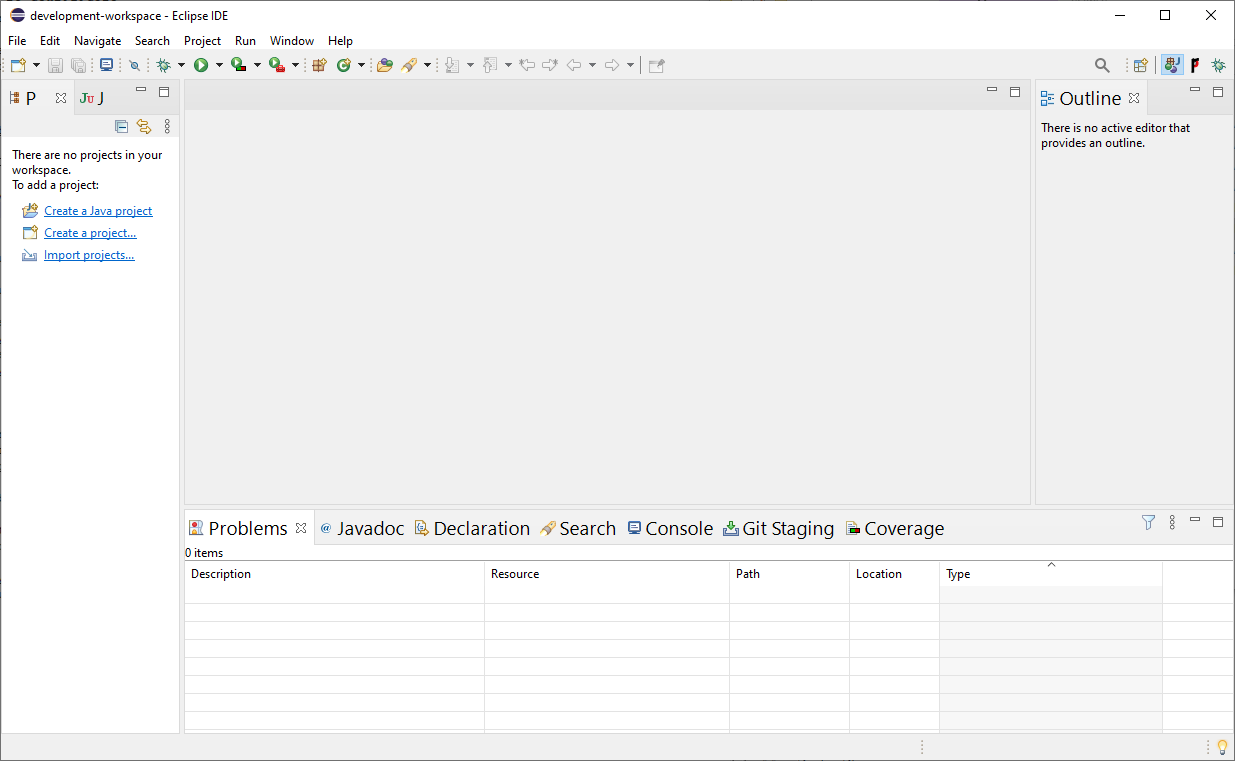
The main Eclipse interface is called the Java Perspective (designated by the Java Perspective icon  in the upper right of the user interface). A perspective provides tools (e.g., editors, problems list, outline, test results) appropriate to a major developer activity such as development or debugging. A perspective contains windows (called “Views”) that support the overarching activity.
The Java perspective has a tool bar of buttons along the top that enables you to create new items or run an application. The view on the left side of the perspective is the Package Explorer, which contains the project contents shown in a hierarchal manner. The middle view of the perspective is the editor, which contains tabs for each file open for editing. The Outline view, along the right of the perspective, lists key information about the file open in the editor. If the file is a Java file, the Outline View will list the methods. The upper right view is a Task List. The bottom of the perspective contains the Problems view and several other views as tabs. The Problems view lists compiler errors and warnings.
You can move around and resize the views that make up the perspective. You can stack views in an area of the screen and use tabs to switch between views. If you want to reset the perspective to how it originally looked, go to Window > Reset Perspective. If you are not in the Java perspective, use Window > Open Perspective > Other... > Java (NOT Java Browsing!). You can customize your perspective with additional views using Window > Show View and selecting a listed view or Other.
Create an Eclipse Project
Now that your Eclipse workspace is set up, start your first project. This project does not need to be submitted, but you will be expected to complete all of the activities in this section on your own later in the Guided Project.
An Eclipse project is a grouping of files that are all part of one application or program. Many Java files, compiled Java .class files, test code and supporting files, documentation, a project’s website, and other resources can all be in a single Eclipse project.
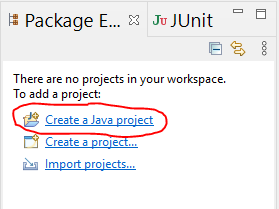
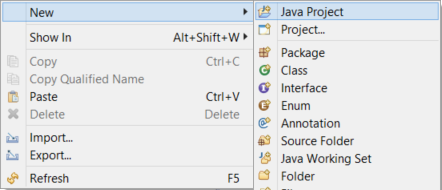
- If you have never created a project in the workspace before, the Package Explorer will have the option to Create a Java project. If you have created projects before, you can right click in the Package Explorer and select New > Java Project.
- A window pops up for selecting project settings. Type
HelloWorldas the name of your project. Click the option to Create separate folders for sources and class files. This ensures that your*.javaand*.classfiles are stored in different directories, allowing for a neater project folder. Uncheck the option to Create module-info.java file as circled below.

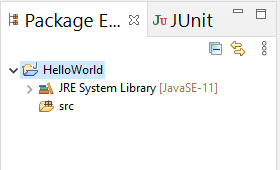
Your new project should be listed in the Package Explorer. Click on the arrow or plus sign next to the project name to expand and look inside your project.
Notice the src/ folder in your project. This is where all of your Java source code files will reside. If you do not have a src/ folder, right click on the project name and select New > Source Folder. In the resulting dialog, name the folder src/. A bin/ folder (which will store all your compiled class files) will be automatically created for you. The bin/ folder is not displayed in the Package Explorer. If you go to the project’s directory on your file system, you will see the bin/ folder with the *.class files.
Create a Package
Packages are a way of organizing java files into folders that contain related functionality. For example, you may have a package for your plain old java objects, a package for any file reading and writing functionality, and a package that contains the business logic of the application.
Packages are also used to name applications and Eclipse plug-ins. If you look in the <YOUR INSTALL DIRECTORY>/eclipse-install/eclipse/plugins directory, you will see a file with the name org.eclipse.equinox.launcher_1.5.400.v20190515-0925.jar. The first part, org.eclipse.equinox.launcher is the package name. The package name indicates that the entity that created the code is a organization (org), that the organization is eclipse, the project is equinox, and the code in the package is the launcher functionality. The numbers specify the version of launcher and the build date and time of the jar file.
Conceptual Knowledge: Access Control
In Java, you can provide modifiers to fields, constants, and methods that determine whether other classes are able to access those elements. The public modifier, typically used on methods, means that any other class can call the method on an instance of the object (or in the case of a static method, on the class itself). The private modifier encapsulates or hides fields from direct access by other classes. The private access modifier is helpful for auxiliary methods that do not need to be exposed to a client class.
There are two other modifiers that you need to know about: no modifier (or default level access) and protected. If a Java element has no modifier, it has default level access, which means that elements of the class itself can access the given element AND methods of any other class in the same package can access the elements with default level access! Protected level access means that elements of the class, the same package, and any subclass can access the protected element (you’ll work with subclasses in GP2). The table below summarizes the access control modifiers.
| Modifier | Class | Package | Subclass | World |
|---|---|---|---|---|
private |
Y | N | N | N |
| No modifier | Y | Y | N | N |
protected |
Y | Y | Y | N |
public |
Y | Y | Y | Y |
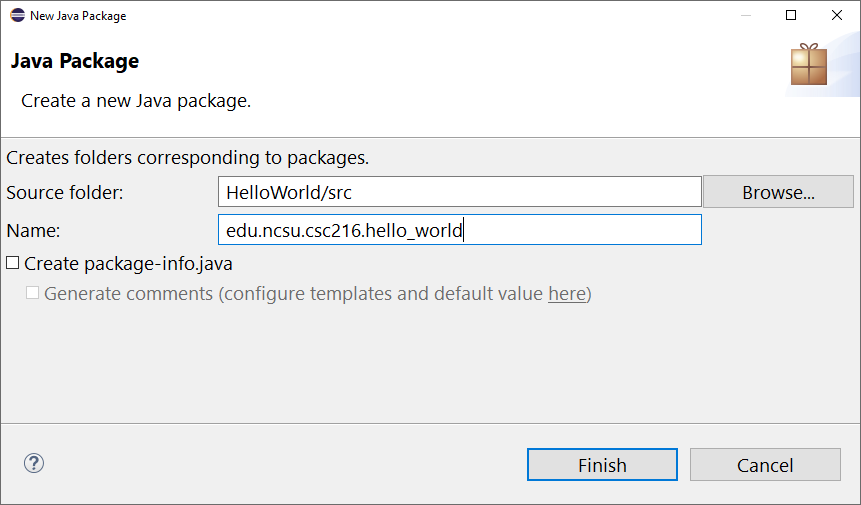
Create your package by
-
Right clicking on the
src/folder and selecting New > Package. -
In the resulting dialog, enter
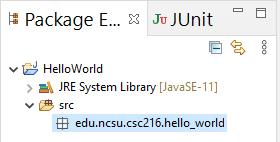
edu.ncsu.csc216.hello_worldfor the package name. Verify that the source folder isHelloWorld/src/. -
Click Finish.
The package name indicates that you are part of an educational organization (edu), specifically NCSU (ncsu), and completing work for CSC216 (csc216). The last part of the package name identifies this specific project (hello_world). Package names are typically all lower case with words separated by an underscore (_).
Best Practice: IDE Customization
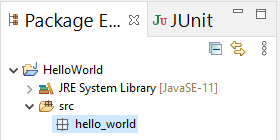
IDEs allow for customization of the workspace to help developers be more productive. Eclipse is a highly configurable IDE. You may find the following customization useful if you find the package names are too long for disambiguation in the Package Explorer view.
You can shorten the way that package names are displayed in the Package Explorer by selecting Window > Preferences > Java > Appearance. Check the box next to Compress all package name segments, except the final segment and enter 0 (zero) in the text box. Click OK. This will shorten the packages in your project to the last segment, in our case hello_world. When you look at the folder structure on the file system and the package imports in the source code, the full package remains.
Create a Class
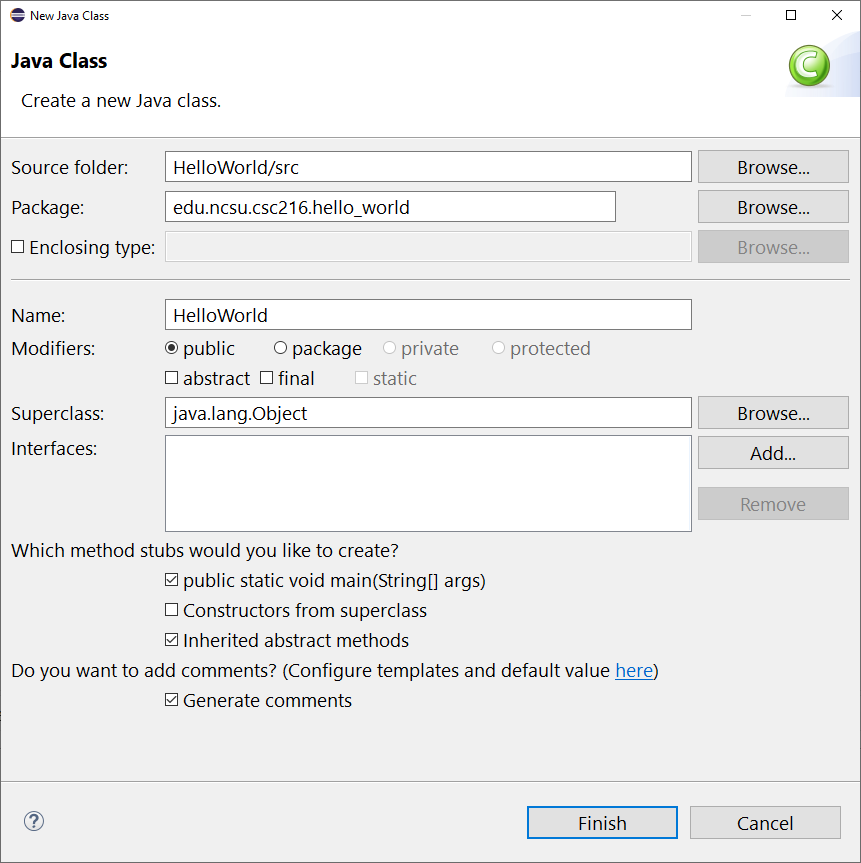
IDEs such as Eclipse provide shortcuts or wizards for creating common programming elements, like classes. You will use the New Java Class Wizard to help create your first Java class in Eclipse named HelloWorld that will be saved in a file HelloWorld.java. The class will be in your edu.ncsu.csc216.hello_world package.
-
Right-click on the
edu.ncsu.csc216.hello_worldpackage, and select New > Class. -
In the Name box, type
HelloWorldfor the name of your class (you do not need the.javaextension - Eclipse will add that for you automatically). Also, check the box that sayspublic static void main(String [] args)as a method stub that you would like generate. Verify the following:- Source folder:
HelloWorld/src - Package:
edu.ncsu.csc216.hello_world - Name:
HelloWorld - Modifiers:
public - Superclass:
java.lang.Object - Which method stubs would you like to create? At least
public static void main (String [] args)should be selected. - You can optionally select the checkbox for Generate comments
- Source folder:
- Click Finish.
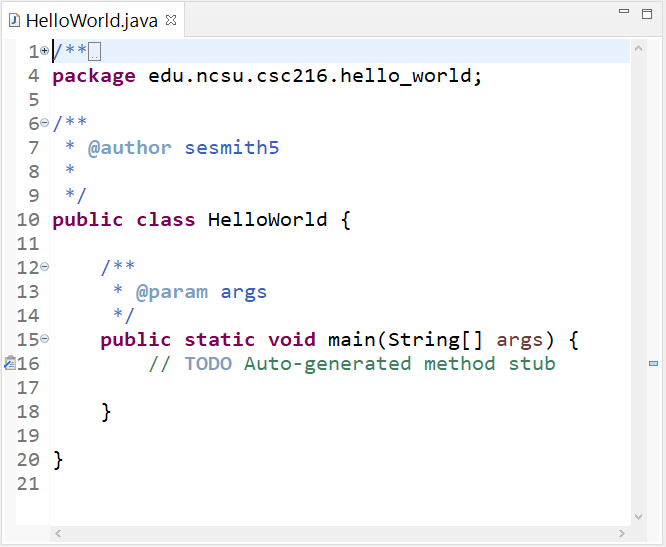
Eclipse generates a file named HelloWorld.java in the HelloWorld/src/edu/ncsu/csc216/hello_world folder with a main method. The file is opened in the Java editor so you can start working on it right away.
That means you will have a project folder called HelloWorld and a class in the project HelloWorld saved in the file HelloWorld.java. Class names and project names do NOT need to be the same. In fact, class names must be distinct within packages, and unique names are encouraged within projects to ease maintenance.
Editing a Class
You are going to edit your HelloWorld class to include a statement that will print "Hello, World!" to the console.
-
Place a print statement for the
Stringliteral"Hello, World!"in themainmethod. You can delete theTODOcomment when you add the print statement. -
Click the Save button (
 in the top menu (or press Ctrl+S - Cmd+S on Macs).
As you are typing the print statement into the editor, you may see a red x ( ) to the left of your line. Eclipse is trying to compile your code as you type, and since you have an uncompleted statement, Eclipse shows a compilation error. Simply ignore the red x for now, and focus on finishing your statement. Saving the file compiles the program, which is equivalent to running the command
 javac HelloWorld.java on the command line. Any compiler errors will appear in the Problems View after you save your file. Additionally, any line of code with a compiler error will have a red x to the left, and there will be a red squiggly line under the code. Fix any compiler errors in your code.
Running a Java Program
You now have everything you need to execute your program!
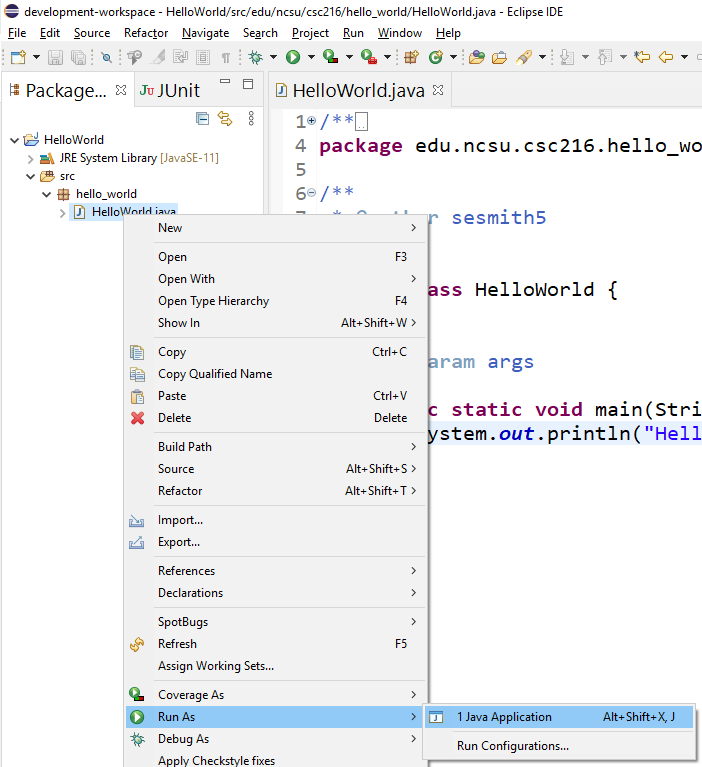
- If there are no compiler errors, right-click on
HelloWorld.javain the Package Explorer and select Run As > Java Application.
The program output of Hello, World! is printed to the Eclipse Console view. If you do not see the Console view, select Window > Show View > Console. You may need to rerun your program for the output to display in the Console view.
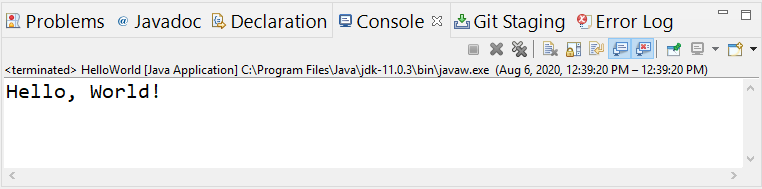
You just ran your first Java program in Eclipse!