Guided Task: Run the Debugger
You have a failing test case! The test is considering invalid paths of the setMeetingDaysAndTime() functionality for an Event. As defined in [UC6], an Event’s meetingDays are valid for Sunday through Saturday. You’ll represent Sunday with a U and Saturday with an S. That means the meetingDays value of “A” is not valid for Event. The test is failing because you CAN set the meetingDays to “A”. It’s time to use the debugger to find where you need to fix your code.
The debugger is a tool that steps through your program a statement at a time. You can follow the flow of control into a called method. Additionally, the debugger provides a view into the values of variables as the code is executing. It’s a very helpful tool for finding and fixing faults in your code.
Learning Outcomes
- Use the debugger to fix a failing test.
Set a Breakpoint
When you debug code, you need to stop the execution so you can then step through the program. A breakpoint pauses the execution of the program. Then you can view information about the program’s state.
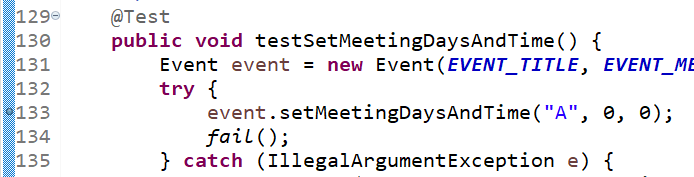
When a test fails, you should put a breakpoint at the line of the code under test that you think is causing the failure. For the failure at line 134 in EventTest.testSetMeetingDaysAndTime(), the call to the code under test that you want to investigate is at line 133: event.setMeetingDaysAndTime("A", 0, 0); Double click in the left blue gutter bar to place a breakpoint.
Run the Program through the Debugger
Running the debugger is similar to running a program: right click on EventTest in the Package Explorer and select Debug As > JUnit Test. (Alternative way: There is also a debug button the top level tool bar. Select Debug. In the resulting dialog, select JUnit Test and then the New icon along the top left of the menu. Select your test class, package, or source folder.)
You may get a message about switching perspectives - this is okay. If you check the “Remember my decision,” you will not see this dialog again.
The Debug Perspective provides several views to help you with the task of debugging your code.
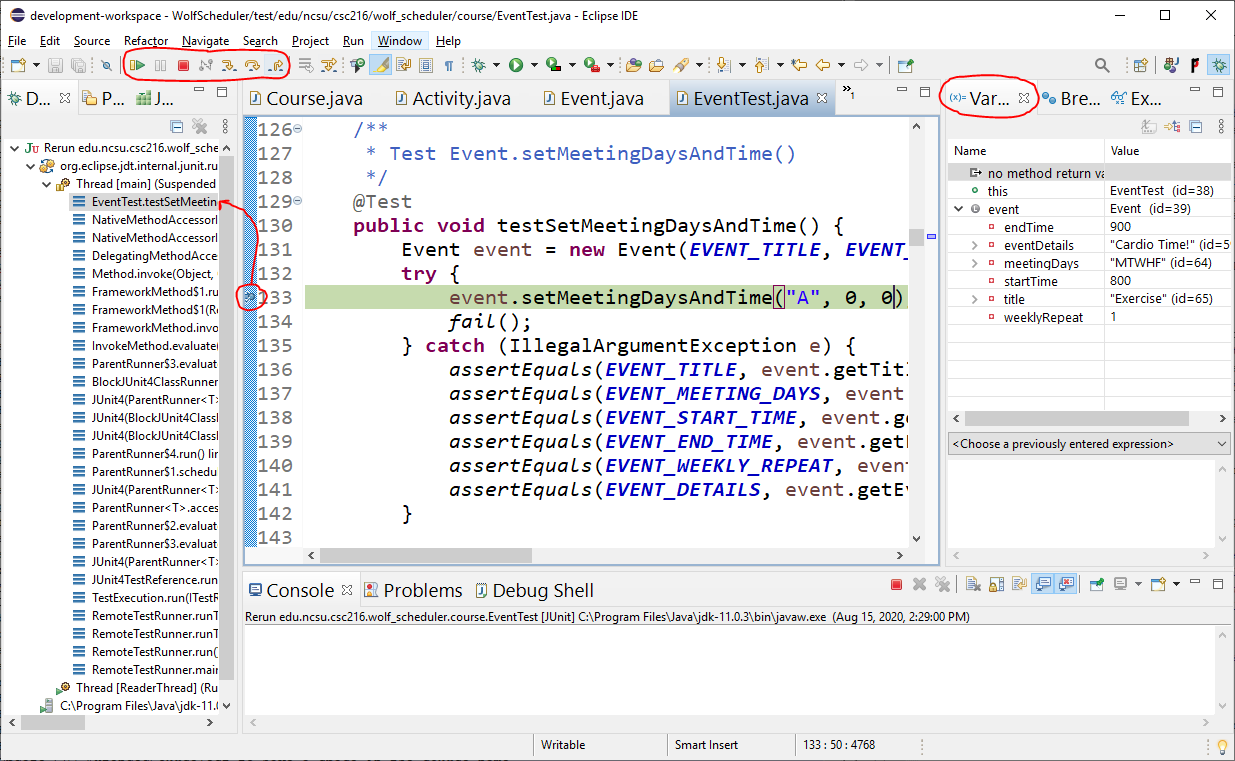
- Debug shows the live stack trace of methods. The figure illustrates the stack trace in execution of
EventTest.testSetMeetingDaysAndTime(). If other programs were running at the same time, you would see them here. - Stepping Buttons are in the top tool bar. The provide the ability to restart execution, stop execution, and step through the code. We’ll cover this in more detail shortly.
- Variables shows the values of all the variables that have been declared. If your breakpoint stops before a variable’s declaration, that variable will not appear in the list.
- Breakpoints shows the locations of all your breakpoints in the code (you can have many breakpoints).
- EventTest.java shows where you are in the code at the time of the breakpoint. The arrow and highlighted text let you know where you are in the code.
Debugger Controls
The main Eclipse toolbar provides buttons for working with the debugger. There are 7 buttons in the toolbar:
- Resume: resumes the current execution from the given program point
- Suspend: pauses an execution
- Stop: stops the debugging execution. Always stop your debugging executions or you’ll use up a lot of system memory!
- Disconnect: disconnects the debugger
- Step Into: steps into a method call
- Step Over: steps over a method call without going into the details of the method
- Step Return: finishes execution of the current method and returns to the caller

Step Through a Program
You can use the debugger to determine what is happening in a program and find an underlying bug. By exploring the program, you are likely to have a better understanding of the flow of control and identify where an implementation doesn’t meet the requirements.
Since the breakpoint is at line 133 in EventTest with the program statement event.setMeetingDaysAndTime("A", 0, 0);, you now want to step into the method call in order to understand how “A” is being set to the meetingDays field.
Click the Step Into button to transfer the flow of control to the first line of Activity.setMeetingDaysAndTime().
Continue stepping through the method with the Step Over button. You reach the end of the method for the assignment to the meetingDays field without throwing an exception!
At this point you can either Resume or Stop the test run. You know there’s a problem in Activity.setMeetingDaysAndTime().
Debug the Program
The implementation of setMeetingDaysAndTime() in Activity is the implementation extracted from Course. There isn’t an implementation of setMeetingDaysAndTime() that supports Event specifics! You need to make a decision about how to best handle the differences between Course and Event for setMeetingDaysAndTime(). A common implementation in Activity will not work.
The solution is to have Course and Event override the setMeetingDaysAndTime() method. Course and Activity will handle their own checks on meetingDays appropriate for their requirements. Then they will pass meetingDays, startTime, and endTime to Activity.setMeetingDaysAndTime() for the common time checks and assignment of the fields.
- Override
setMeetingDaysAndTime()inCourseand ensure that [UC1] is satisfied. - Override
setMeetingDaysAndTime()inEventand ensure that [UC6] is satisfied. Note that for themeetingDays, string “U” represents Sunday and “S” represents Saturday. The other days of week characters are the same asCourse. Any other character, including “A”, is invalid
Run Tests
Run your tests! If any are still failing, use the debugger to help you find the problem.
Comment Event and Fix Static Analysis Notifications
Complete the following tasks:
- Update all your Javadoc for
CourseandEvent. Overridden methods much also be commented to describe the specifics in the overridden implementation. - Resolve all static analysis notifications.
Additional Resources on the Debugger
This was a very brief overview of using the debugger. If you would like more information, please see the Eclipse Debugger Tutorial.
Reference: Staging and Pushing to GitHub
GitHub Resources:
Check Your Progress
Complete the following tasks before pushing your work to GitHub.
- Make sure that all fields, methods, and constructors are commented.
- Resolve all static analysis notifications.
- Fix test failures.
- Commit and push your code changes with a meaningful commit message. Label your commit with “[Debug]” for future you!