Guided Task: Guided Project 2 GitHub Repository
You will be assigned a separate GitHub repository for each Guided Project and each major Project. This is to ensure that your work on each is distinct and that any work on a new project doesn’t get recorded as late work on an old project. However, you will continue with the same WolfScheduler project for GP2. You need to share the project to your GP2 repository.
Learning Outcomes
- Disconnect a project from a GitHub repository
- Share a project with a new GitHub repository
- Push changes to a new remote GitHub repository
Best Practice: Version Control
A project may belong to only a single local repository. That is because a Git repository is represented as a folder on a file system with a special .git/ folder that stores Git metadata. The same project cannot be in two locations on the file system at once. The process outlined below will let you share an existing Eclipse project with a new repository and then retain a copy of your Guided Project 1 submission in a local copy of your Guided Project 1 repository.
Tools: Git and GitHub
Git is a distributed version control system. Git supports the creation of repositories, copying of repositories (cloning), committing changes, working with remote repositories, and merging changes. In Git, all repositories are considered equal and each maintains its own history. You can move information between connected repositories through pulling and pushing any changes.
Disconnect WolfScheduler from GP1 Repository
Disconnecting a project from a Git repository removes any associated metadata about the project from the repository. To disconnect, do the following:
- Right click on the
WolfSchedulerproject - Select Team > Disconnect.
- The repository name to the right of the
WolfSchedulerproject will no longer be available.
Reminder: Working with GitHub
Cloning a Repository
Adding (Staging a Project)
Committing Staged Changes
Pushing Committed Changes
Push WolfScheduler to your GP2 Repository
Complete the following steps to push WolfScheduler to your GP2 repository.
- Clone your GP2 repository provided by the teaching staff. The pattern will be
csc216-XXX-GP2-YYY, where XXX is your section number and YYY is your repository number. - Stage your
WolfSchedulerto your GP2 repository by right clicking on the project and selecting Team > Share Project. - In the Configure Git Repository pop-up, uncheck the option Use or create repository in parent folder of project. Then select your new repository from the drop down and check your project.
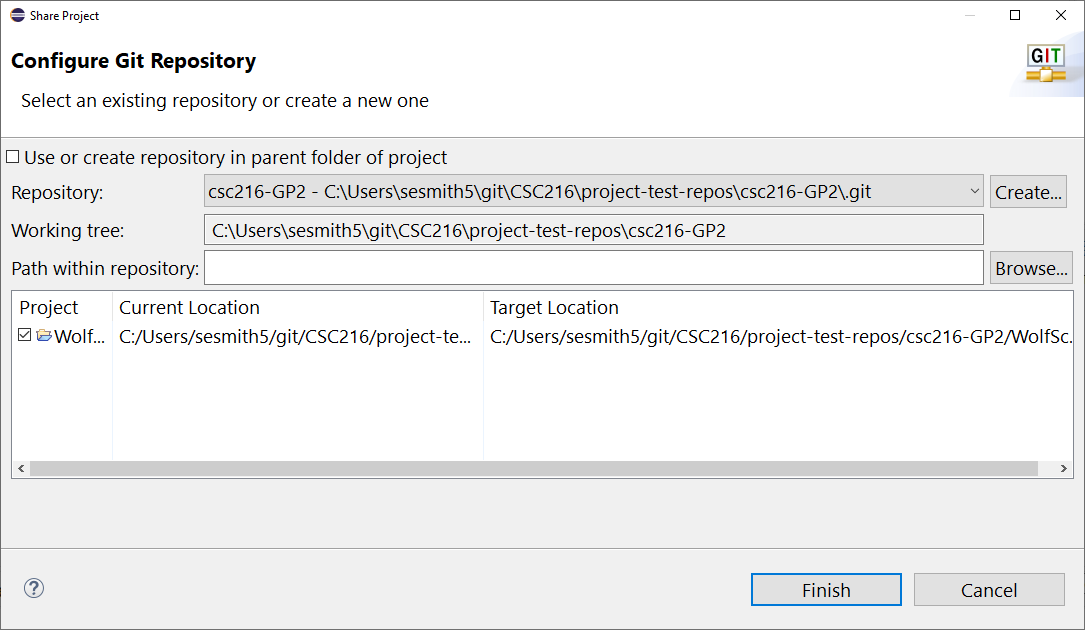
- Now that your project is staged for the GP2 repository, add the files to the index by right clicking on the
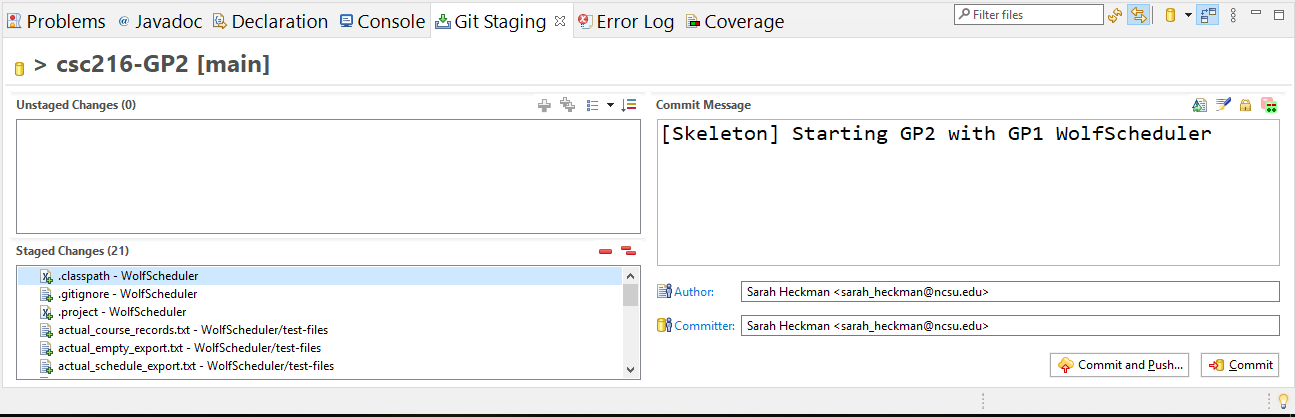
WolfSchedulerproject and selecting Team > Add to index. Then Commit and Push the project to start GP2! Use a commit message like “[Skeleton] Starting GP2 with GP1 WolfScheduler”.
Reset your GP1 WolfScheduler
When you shared the WolfScheduler project with your new GP2 repo, that removed the WolfScheduler directory from your local GP1 repo directory. If you want to keep a copy of your GP1 WolfScheduler, you should reset your local GP1 repository to the last commit in the remote. Then your local GP1 repository will have a copy of your final GP1 WolfScheduler submission. You can use that as a backup as you’re working on GP2!
Choose to do the reset in either Eclipse or Git Bash!
In Eclipse, do the following:
- Right click on your GP1 repository in the Git Repositories view and select Reset.
- Make sure the last commit is selected and select the option for a Reset type of Hard (HEAD, index, and working tree updated). Click Reset.
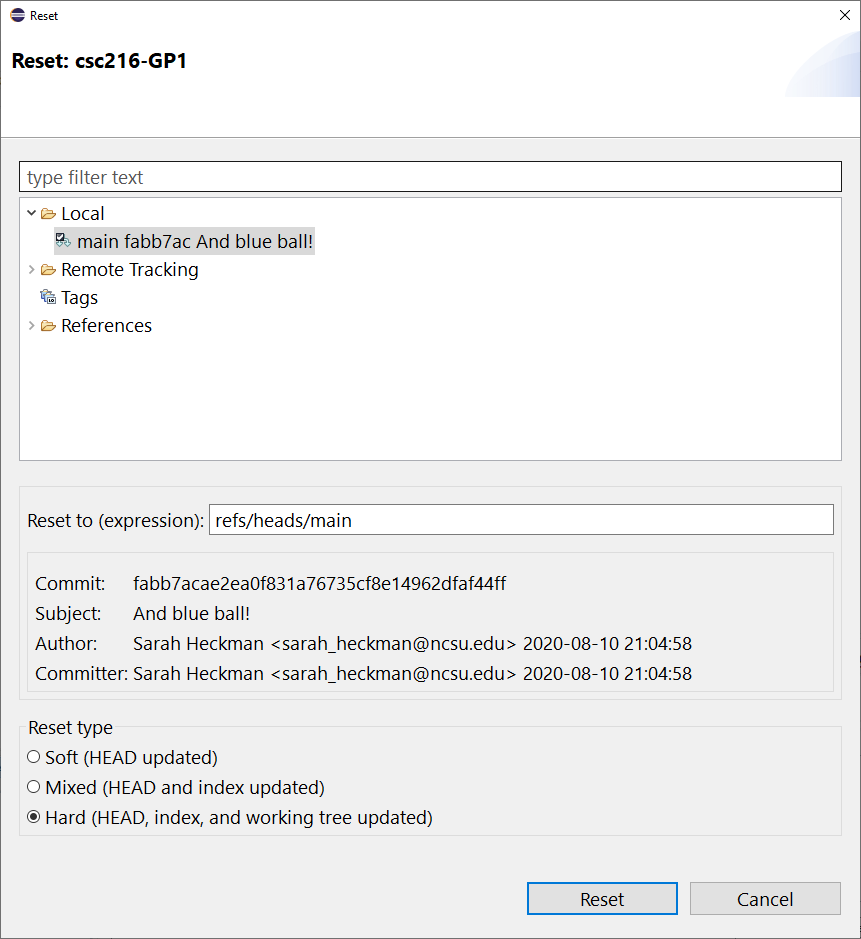
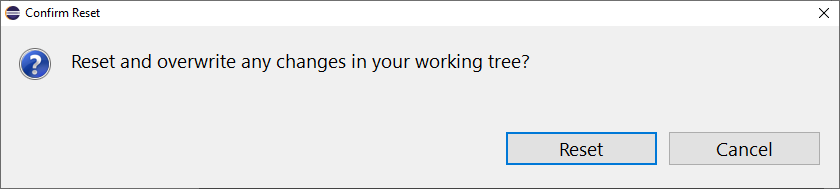
- You will receive a warning about overwriting your local changes. This is what we want since we want to bring a copy of the project back into our local GP1 repository and erase all of your uncommitted local changes (which in this case is all the deleted
WolfSchedulerfiles). Click Reset.
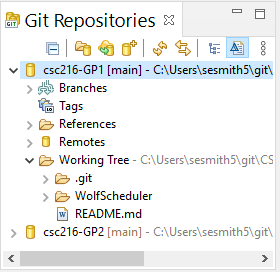
- Check that
WolfScheduleris now in theWorking Tree/directory of your GP1 repository.
In Git Bash, do the following:
- Change directory to your repository location.
- Enter the command
git reset --hard HEAD. This will reset the local repository to the same information as the remote and erase all of your uncommitted local changes (which in this case is all the deletedWolfSchedulerfiles).
Caution: Resetting a Repo
In this case, resetting the repo is useful, but the reset command can lead to major problems. Use the power of the reset command carefully!
Check Your Submission
You should ALWAYS verify that your pushed changes are on the remote repository. You can do this by going to your repository on the GitHub website and making sure that your WolfScheduler project has been pushed to your GP2 repository.
- Log into NCSU’s GitHub
- Select the appropriate organization and repository.
- Verify that your latest commit message is listed and that all pushed files are in the repository.
Verify that your Guided Project 2 Jenkins job is pulling your WolfScheduler from your GP2 repository (this job will start with GP2-. If Jenkins does not recognize your project, please notify the teaching staff via Piazza or the sup list as early as possible to ensure that your project is set up correctly for auto grading.
Caution: Red Ball on Jenkins is OK (at this point)
At this point, your Jenkins build will be a red ball. That is expected because there are several things that we have to do in Guided Project 2 before our code will even compile. The important thing is that the job runs and gives you a red ball!
Reference: Staging and Pushing to GitHub
GitHub Resources:
Check Your Progress
- Make sure that all fields, methods, and constructors are commented.
- Resolve all static analysis notifications.
- Fix test failures.
- Commit and push your code changes with a meaningful commit message. Label your commit with “[Skeleton]” for future you!