Guided Task: Push WolfScheduler to GitHub
Submission of all major course deliverables for Guided Projects, Labs, and Part 2s of Projects is through the Git version control system and NCSU’s Enterprise GitHub. You should go through the Git and GitHub Tutorial to familiarize yourself with the technologies before completing this Guided Task.
Learning Outcomes
- Clone a GitHub repository
- Share a project with a GitHub repository
- Push changes to a remote GitHub repository
Best Practice: Version Control
A version control system stores the history of development on a given project in a central location. Additionally, a version control system provides mechanisms for teams to collaborate on the same code base. In a version control system, there is typically a remote repository that contains the main copy of the code and all of the development history or contributions of the developers. Developers have a local copy of the remote’s code where they can make changes to fix bugs or add new functionality. Those changes are then copied or pushed to the remote’s repository and are integrated into the main code base. Other team members can checkout or pull the changes from the remote to their local copies of the code and continue working on their development tasks. If there are major issues with a system, a development team can roll back to an earlier version of the code base.
Tools: Git and GitHub
Git is a distributed version control system. Git supports the creation of repositories, copying of repositories (cloning), committing changes, working with remote repositories, and merging changes. In Git, all repositories are considered equal and each maintain their own history. You can move information between connected repositories through pulling and pushing any changes.
When using Git, you will have a remote Git repository that exists on NCSU’s Enterprise GitHub server. That remote repository is where all of your files must end up for grading. You will have a local repository that is cloned from the provided remote repository. You will develop in your local repository and push your changes to the remote repository. If you’re working with a partner, your partner can pull your changes into their local repository and continue development. The workflow is similar if you’re using Git Bash or Eclipse EGit.
You will be using NCSU’s Enterprise GitHub, which is a web interface for working with Git repositories. The web interface provides a mechanism for viewing your remote Git repository (where all your work is submitted). Additionally, GitHub provides functionality for providing feedback on code and tracking issues.
To be assigned a repository, you must log into NCSU’s GitHub system with your unity id and password.
Git Configuration
Completing a local configuration of Git is useful to streamline usage. We require that commits to NCSU’s GitHub are identified by the student’s unity id. Configure your local Git setup, so that you can ensure that you are using the correct identifiers so that we can give you credit for your work, especially on team assignments.
[OPTIONAL] Connecting to GitHub With SSH
There are two ways to connect to GitHub: 1) HTTPS and 2) SSH.
If you connect to GitHub using HTTPS, you will connect through secure HTTP connections. This will require you to enter your username and password with each interaction with the remote NCSU Enterprise GitHub server.
If you connect to GitHub using SSH, you will use a secure key on your local system to connect with a public key that you have associated with your GitHub account. SSH stand for secure shell (it’s also Dr. Heckman’s initials!) This will serve as your authentication and provide a secure connection; you won’t have to enter your user name and password with every interaction. We strongly encourage you to follow the directions provided by GitHub to set up your local system to use SSH to connect to GitHub.
Reference: Cloning a Repository
For additional information on cloning a repository, see:
Clone the Remote Repository
To work with a new remote repository that is assigned to you for submission of your CSC 216 work, you must first clone the remote repository to your local file system.
-
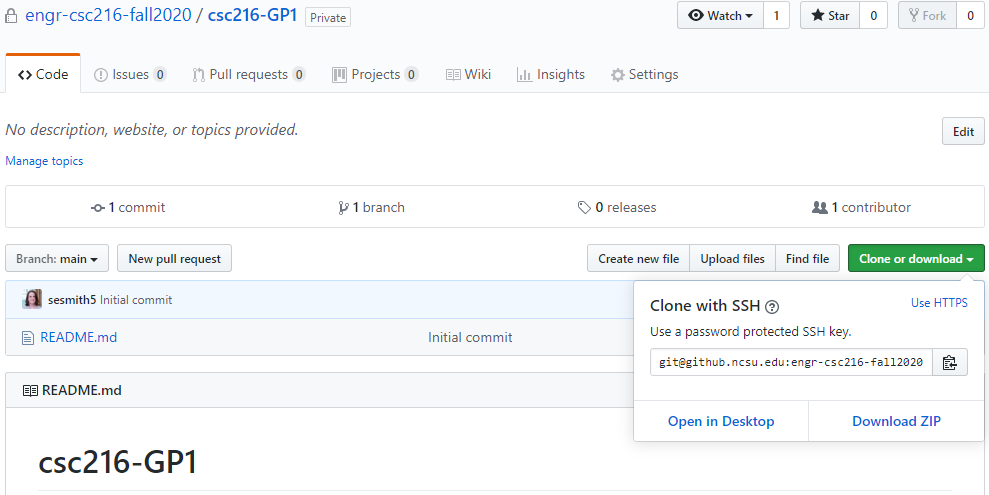
Get your assigned repository’s clone URL:
- Go to NCSU’s Enterprise GitHub.
- Open the dropdown menu under your username in the top left of the page. Choose the CSC 216 organization for the given semester. For example, Fall 2021’s organization is
engr-csc216-fall2021and Spring 2022’s organization isengr-csc216-spring2022. - Select the repository for the given assignment. For example, a repository for Guided Project 1 may be named
csc216-GP1-XXX-YYY, whereXXXis your section number andYYYis your repository number. - First select if you would like to copy the SSH clone URL or the HTTPS clone URL in the drop down menu. Then click the copy button. Only select the SSH URL if you have set up your SSH key.
-
Clone the repository locally. Do ONE of the following.
Clone the repository using Git Bash
- Open Git Bash
- Change directory to the location on your file system where you want your cloned repository to live. Remember this location!
- Execute the command:
git clone <copy clone URL here>
- If you are using HTTPS, enter your unity id and password.
This will create a directory structure on your file system for the local copy of the Git repository. However, this does not add the Git repository information to your Eclipse workspace. To add the repository to Eclipse, do the following:
- Open the Git Repositories view (if it is not already open) by selecting Window > Show View > Other > Git > Git Repositories. Click OK.
- Select the option to Add and existing local Git repository.
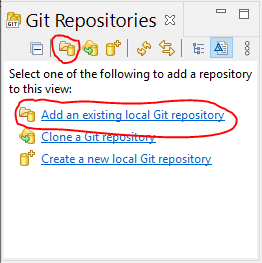
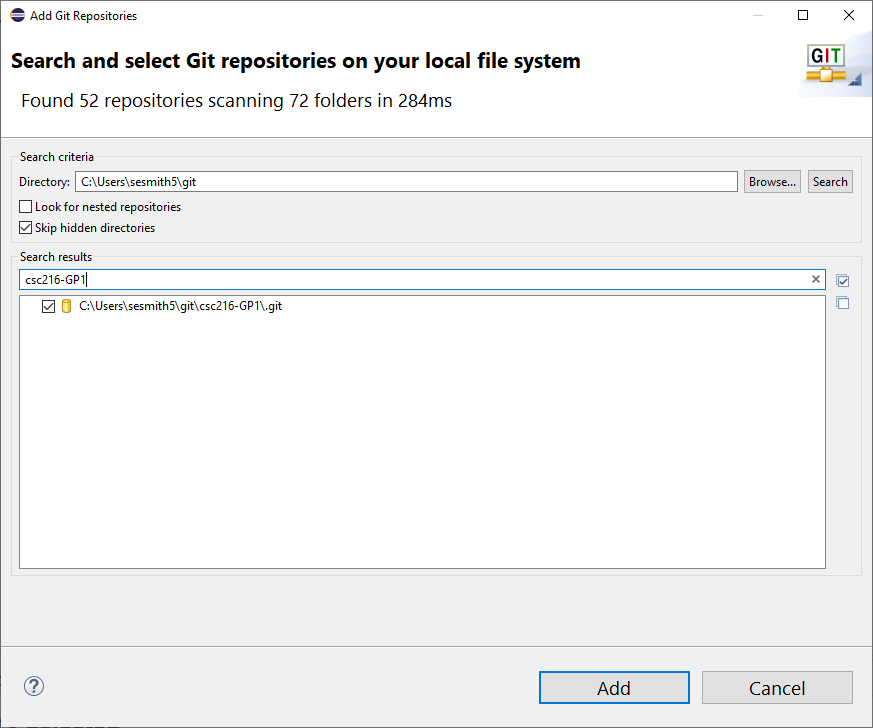
- Eclipse will search your filesystem for folders that are Git repositories (these are folders that contain a
.git/folder). Select the folder that corresponds to the location where you cloned the repo.
- Click Add. Your repository will now be in your Git Repositories view in your Eclipse workspace.

Clone the repository using Eclipse EGit
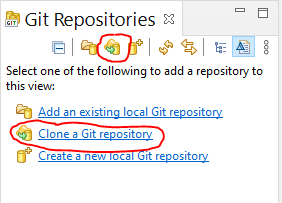
- Open the Git Repositories view (if it is not already open) by selecting Window > Show View > Other > Git > Git Repositories. Click OK.
- Select the option to Clone a Git Repository.
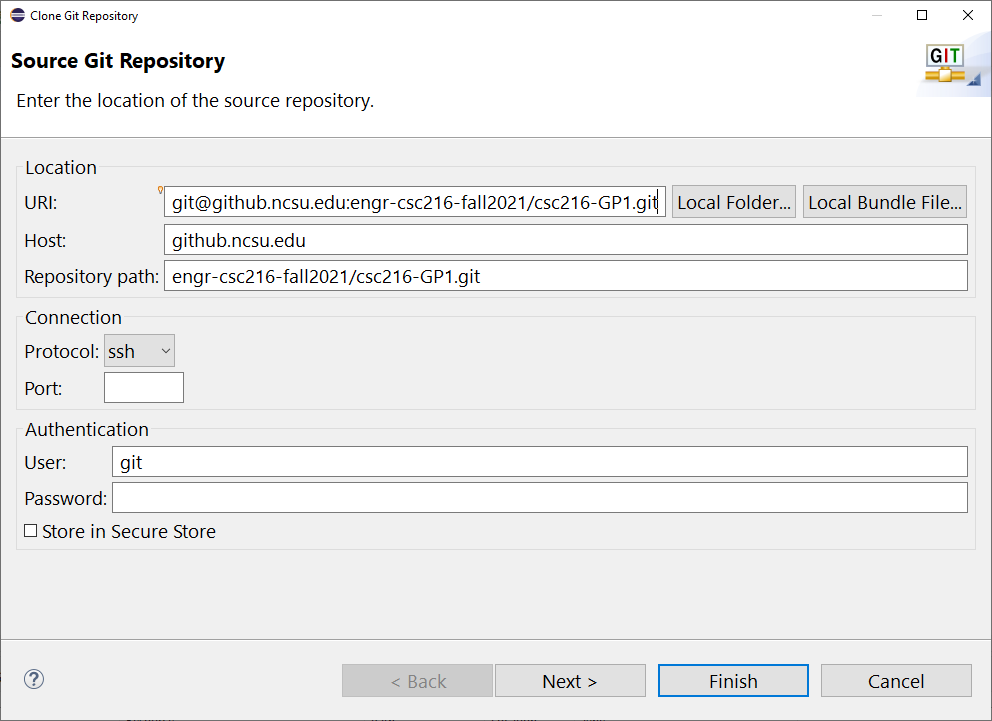
- The Clone Git Repository wizard will display. If you have the Git URL in your computer’s memory, it will populate the URI, Host, and Repository path fields. If you do not, copy the URL and paste it into the URI field. The Host and Repository fields will populate. Click Next.
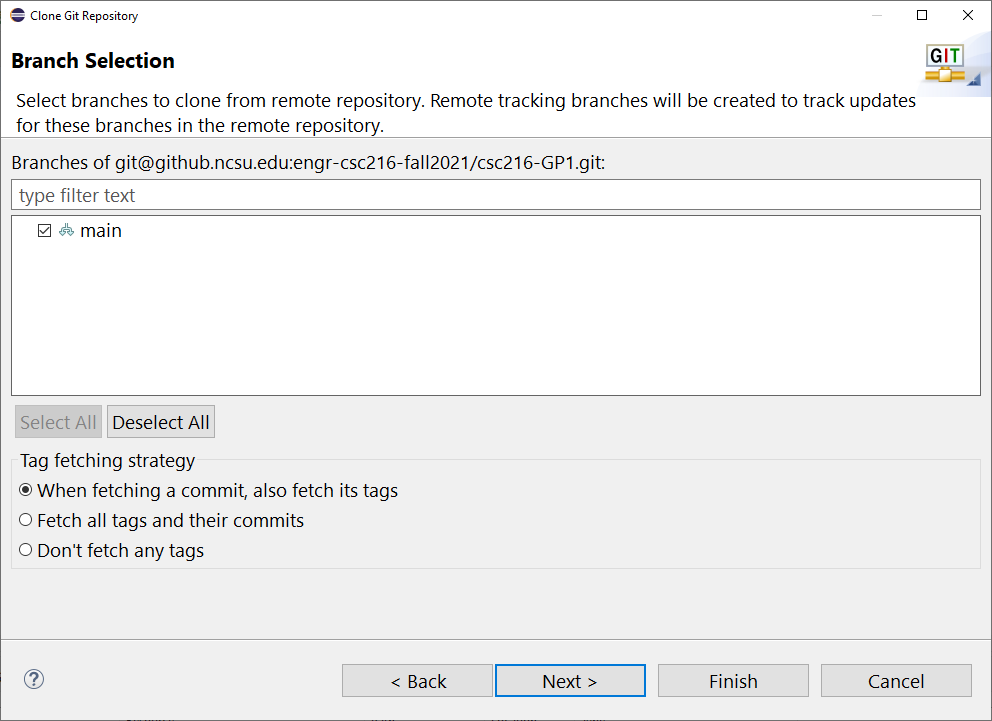
- Make sure that the
mainbranch is selected. Click Next.
- Browse for the location where you want the local copy of the repository to be located on your file system. The default location is a
git/directory under your home directory.
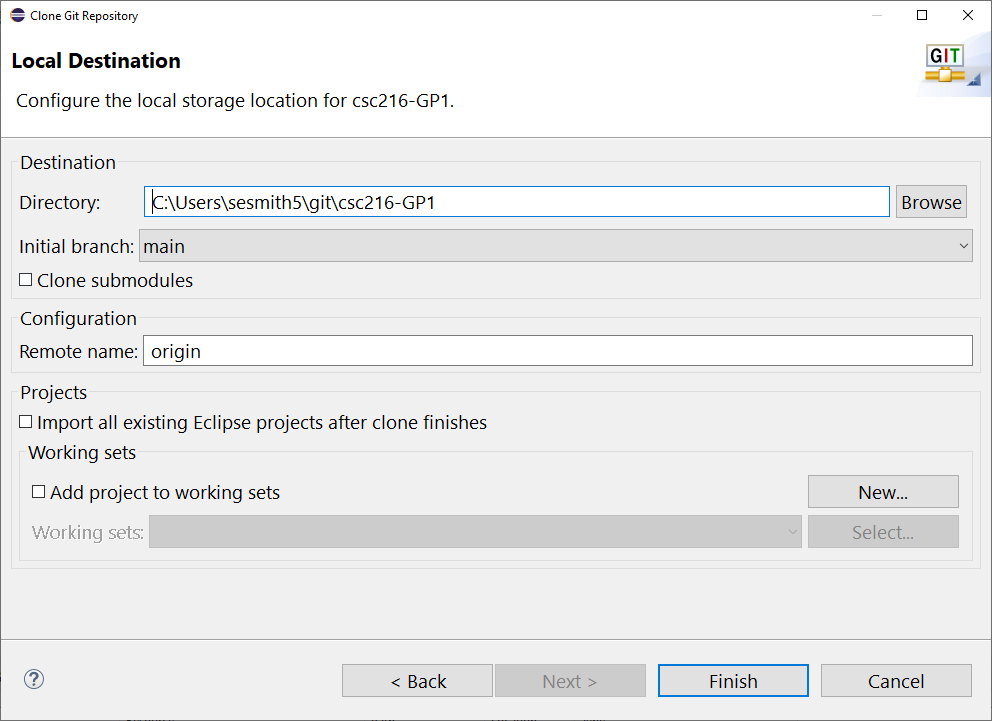
- After you have selected the location, click Finish. The repository will now be listed in the Git Repositories view.
Reference: Adding (Staging) a Project
For additional information on adding (staging) a project to a repository, see:
Adding (Staging) WolfScheduler to a Git Repository
Now that you have a local copy of your remote submission repository, you need to add your project to the local repository. Since you created the project in Eclipse BEFORE cloning your repository, we recommend using EGit to add (stage) your WolfScheduler project to your local Git Repository. This is because EGit will handle the copying of the WolfScheduler project to the repository location on your file system while maintaining the project in Eclipse.
-
Right click on the
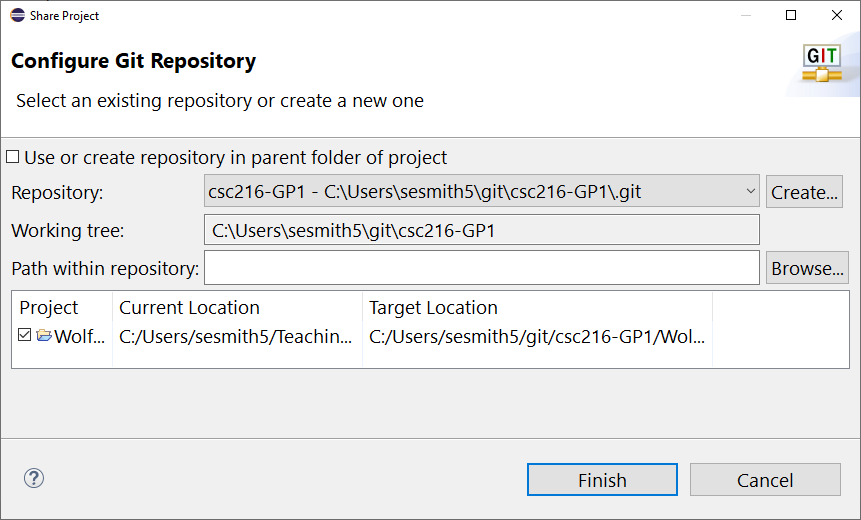
WolfSchedulerproject and select Team > Share Project….. -
Select your repository from the drop down menu and click Finish.
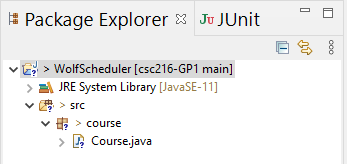
- The project name in the Package Explorer should now be followed with the name of the repository in square brackets.
- To add the files to the index, right click on
WolfSchdulerand select Team > Add to Index.
Reference: Adding (Staging) a Project
For additional information on committing staged changes, see:
For additional information on pushing committed changes to the remote, see:
Committing Local Changes and Pushing to the Remote Repository
Now that your project is staged in the repository, you can commit the changes to the local repository and push the changes to the remote repository and submit your work (so far).
Commit and push your changes. Do one of the following:
- Commit/push using Git Bash
- [RECOMMENDED] Commit/push using EGit
Commit/push using Git Bash
- Change directory to your repository in Git Bash
- First, commit your changes using the following command:
git commit -am "Submitting a skeleton of WolfScheduler."
- Second, push the changes to the remote repository using the following command:
git push
- In Eclipse, click the refresh button in the Git Repositories view for the commit to be recognized by Eclipse.
Commit/push using EGit
- Right click on
WolfSchedulerand select Team > Commit. - In the Git Staging view, do the following:
- Check that all files you want pushed to the remote repository are in the Staged Changes window. Select any files that should be committed/pushed in the Unstaged Changes window, right click and select Add to Index.
- If there are any files that you do not want pushed to the remote repository in the Staged Changes window, right click on the files and select Remove from Index.
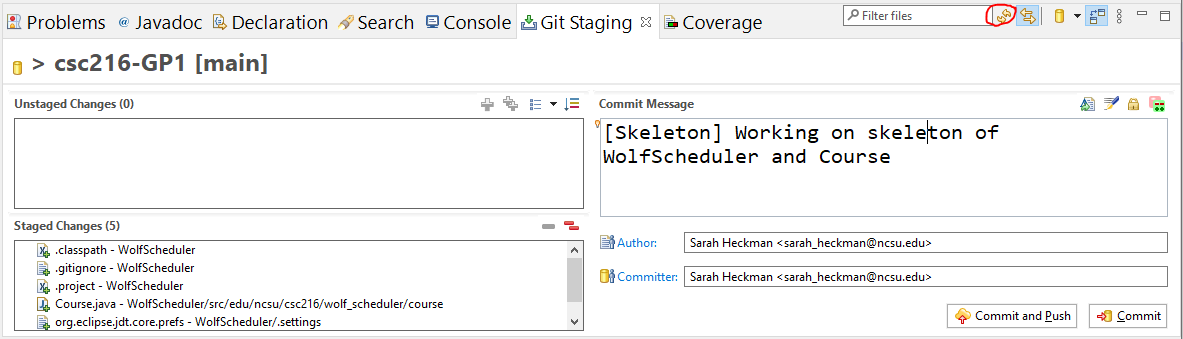
- Make sure that the following files (at least) are staged:
.classpath.gitignore.projectCourse.java
- Enter a commit message like “[Skeleton] Submitting a skeleton of WolfScheduler”.
- Click Commit and Push.
- If your files aren’t showing up in the Staged Changes window, click the refresh button (in the red circle) in the upper left of the view.
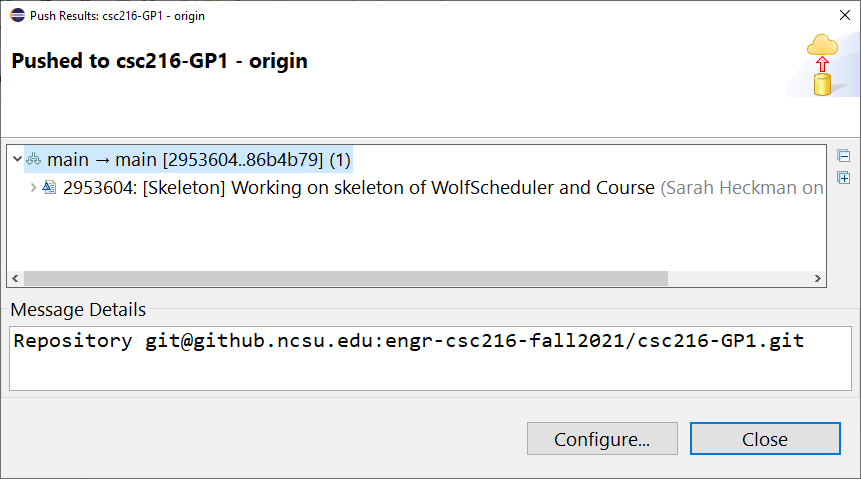
- After the push completes, there will be a confirmation window to show that the project was pushed to the remote correctly. If you see a message about
fast-forward, there was an error. You have a merge conflict and you will need to resolve the conflict.
Check Your Progress
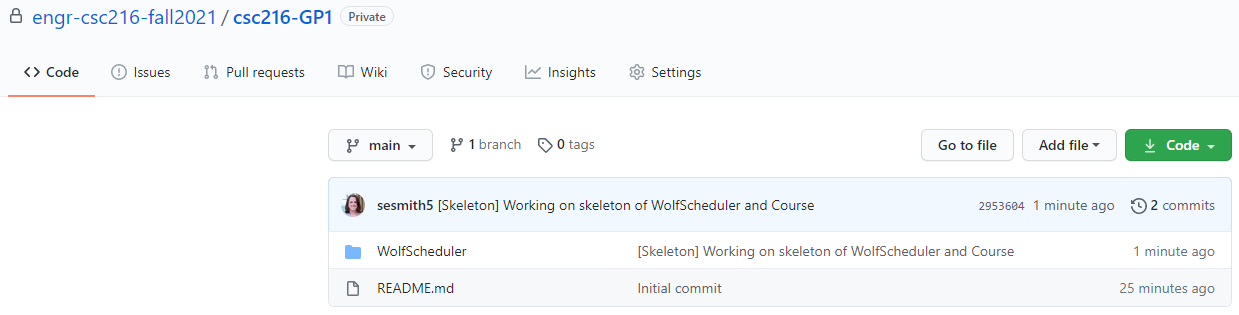
You should ALWAYS verify that your pushed changes are on the remote repository. You can do this by going to your repository on the GitHub website.
-
Log into NCSU’s GitHub
-
Select the appropriate organization and repository.
-
Verify that your latest commit message is listed and that all pushed files are in the repository.
You will follow this process every time you want to submit your code. We recommend frequent pushes to the remote repository to save your work or when you have a problem. It is ok to push code that doesn’t compile or pass all of the tests. When the teaching staff helps you, it is easiest for us to check the code on your repository (assuming you provide a link to your repo for us to use).