Adding Files to your Staging Area
You now need to add the files that you want to version control to your staging area.
Conceptual Knowledge: Tracked and Untracked Files in Git
A code file in your working directory (or Eclipse Project) can either be tracked or untracked.
- A tracked file is one that was in the last snapshot. Tracked files can be unmodified since the previous snapshot, modified since the previous snapshot, or staged in your staging area.
- An untracked file is everything else: any files in your working directory that were not in your last snapshot and not in your staging area.
Best Practice: Changes in Staged Files
Remember that when you add a file to your staging area, you are adding a snapshot of the file at that moment in time. If you make future edits to the file before committing the snapshot, you will need to re-add the file to your staging area so that you grab the most recent version of the file!
You can add files to your staging area by using Git Bash or eGit.
Adding Files to your Staging Area using Git Bash
To add files to your staging area, use the following command:
git add [filename]
For example, you need to add all Java code files in the project to your staging area. Type the following command:
git add *.java
After adding files to your staging area, check the status of your files again using git status.
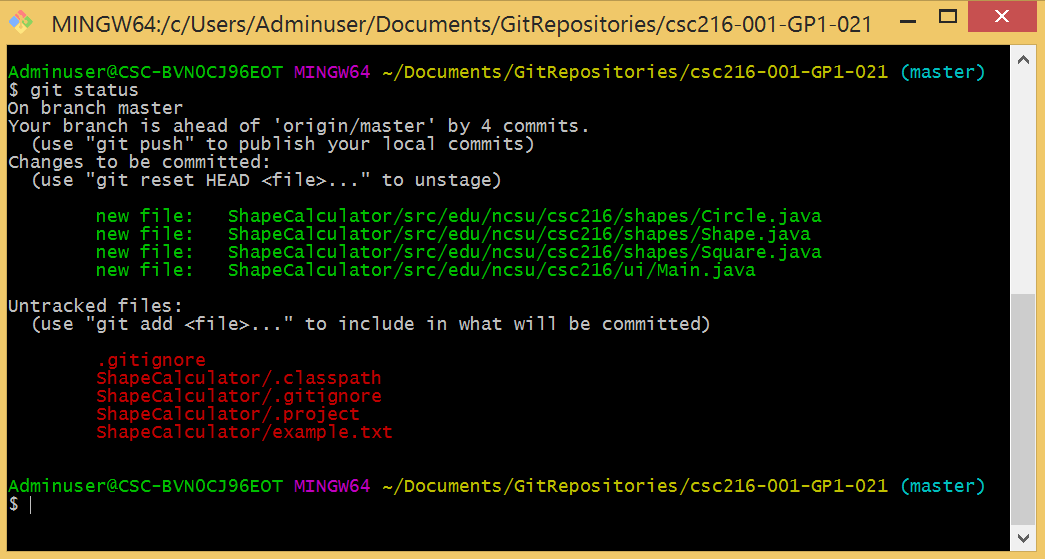
In the figure above, note that all the .java files have been added to the staging area. The status output shows that four files are still untracked:
- .gitignore – you need to track this file so that the same files are consistently ignored on your teammate’s machines
- .classpath – you need to track this file so that Eclipse can correctly and consistently build your project on other machines
- .project – you need to track this file so that Eclipse can correctly identify your code as a valid Eclipse project on other machines
- example.txt – suppose you do not want your repository to store a snapshot of example.txt file yet. You would not add it to your staging area. If you did not want your repository to track the file at all, you could add an additional rule to your .gitignore file.
- You should NOT see a bin directory or .settings directory listed. If you do see a bin or .settings directory, your .gitignore file is missing or incorrect.
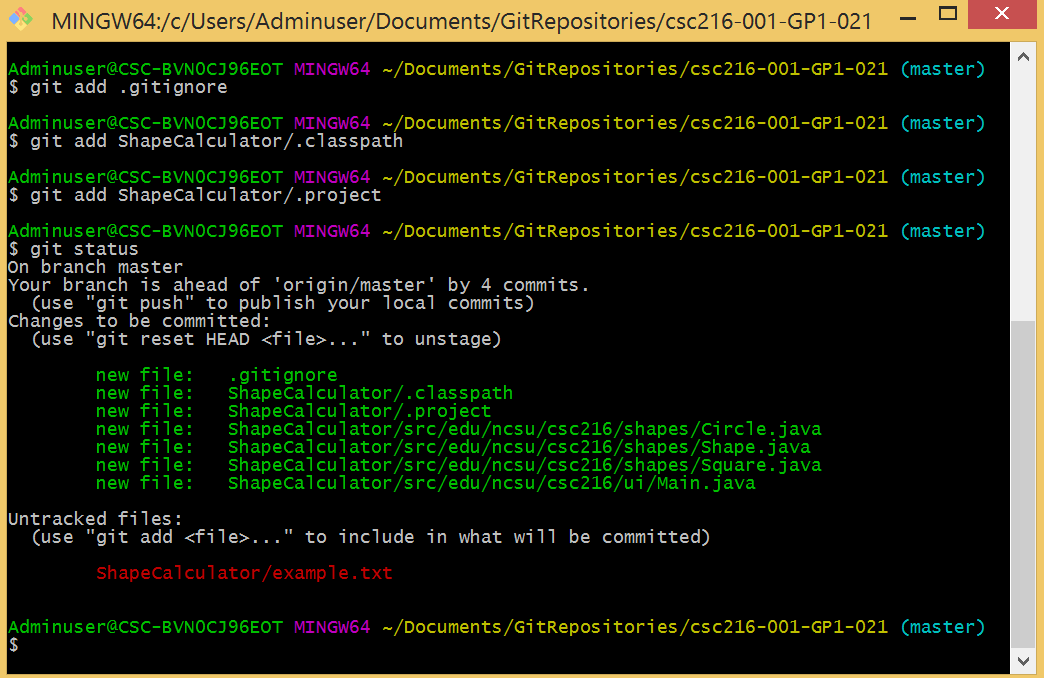
Using git add, add each of the above four files. Now, execute git status again.
Once you have staged all the files that you would like to go into your next commit snapshot, you need to commit the snapshot to your repository.
After you commit, and as you continue to work on your project, suppose:
- You edit the already tracked code file
Square.java. - You execute git add on
Square.javato add the modified version to your staging area. - You later edit the
Square.javafile again without first committing the originalSquare.javamodification.
The git status command should display:
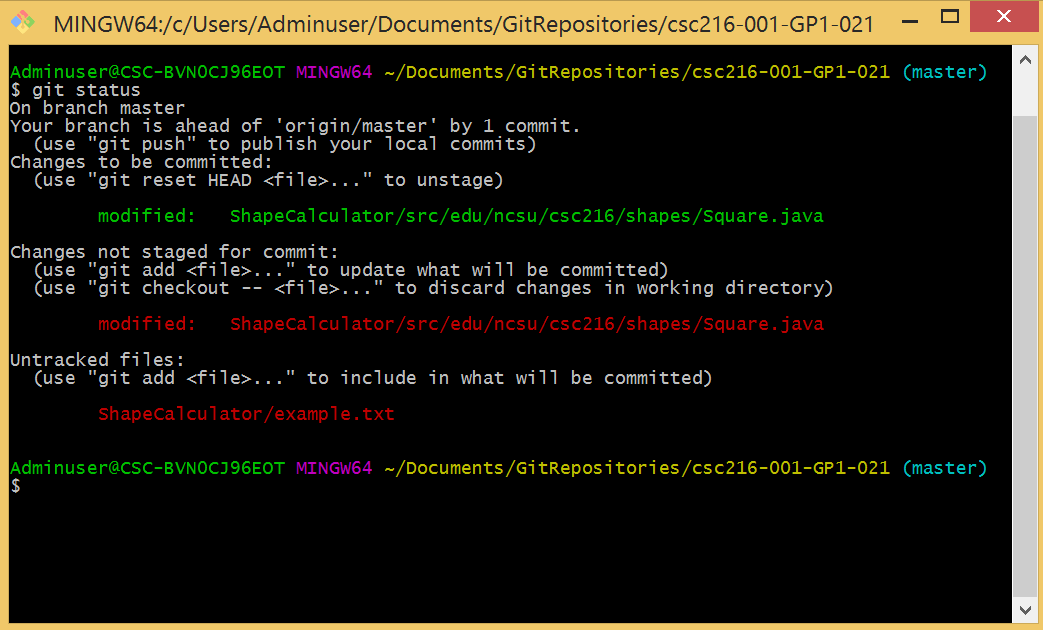
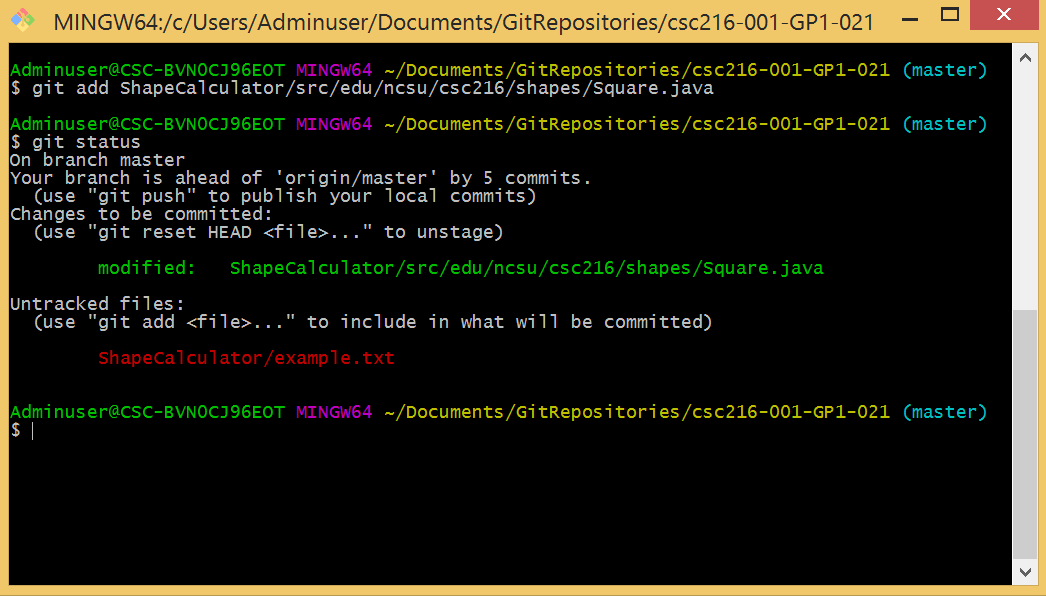
Whoa! Why is Square.java listed twice? Because the git add command adds a snapshot of the file at that specific moment in time when you executed the add command. Now that you have made additional changes to the file, you have to execute the git add command again to add the latest snapshot of the file to the staging area.
Now that you have all of the necessary files in your staging area, you can commit a snapshot of the current version of these files to your git repository.
Adding Files to your Staging Area using eGit
To add files to your staging area using eGit:
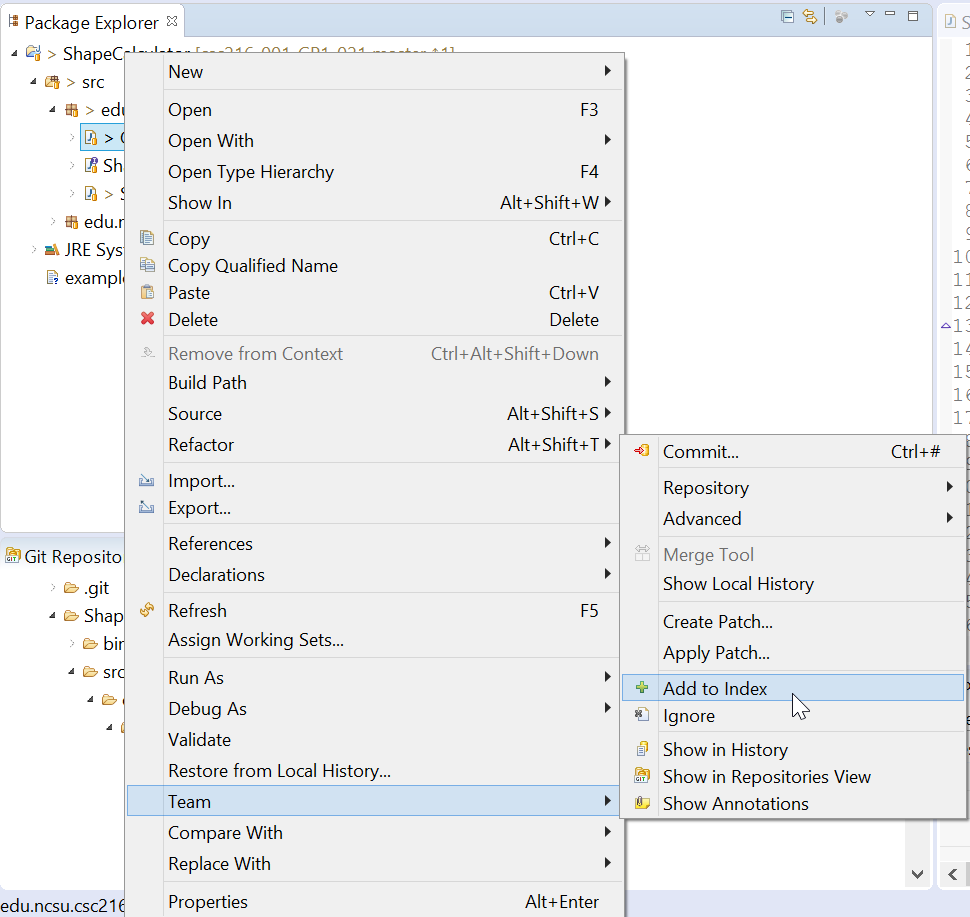
- In Package Explorer, right-click the files that you would like to add to your staging area and choose Team > Add to Index. This makes sure the files are marked to be added to your staging area (or “index”).
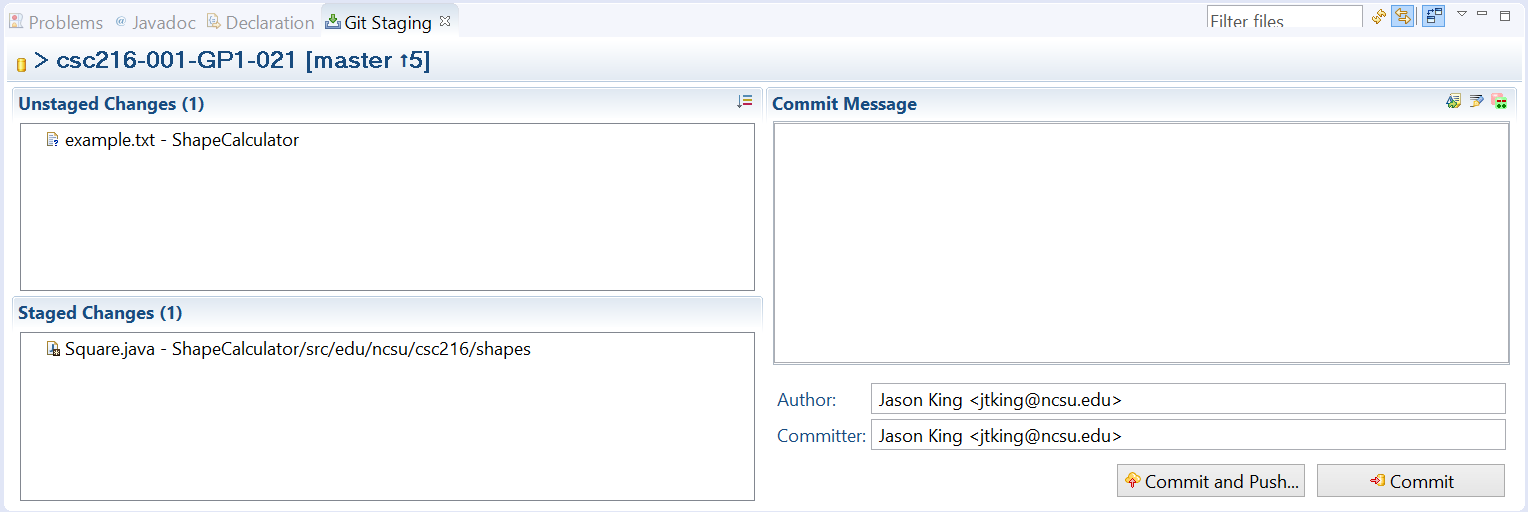
To view your staging area in Eclipse:
- Click Window > Show View > Other.
- Expand the Git folder, and select Git Staging.
- Click OK.
Now that you have all of the necessary files in your staging area, you can commit a snapshot of the current version of the staged files to your git repository.